|
|
Audeonic |

Audeonic Home |
Mapping MPC Fly to BeatMaker 2 Pads |
|
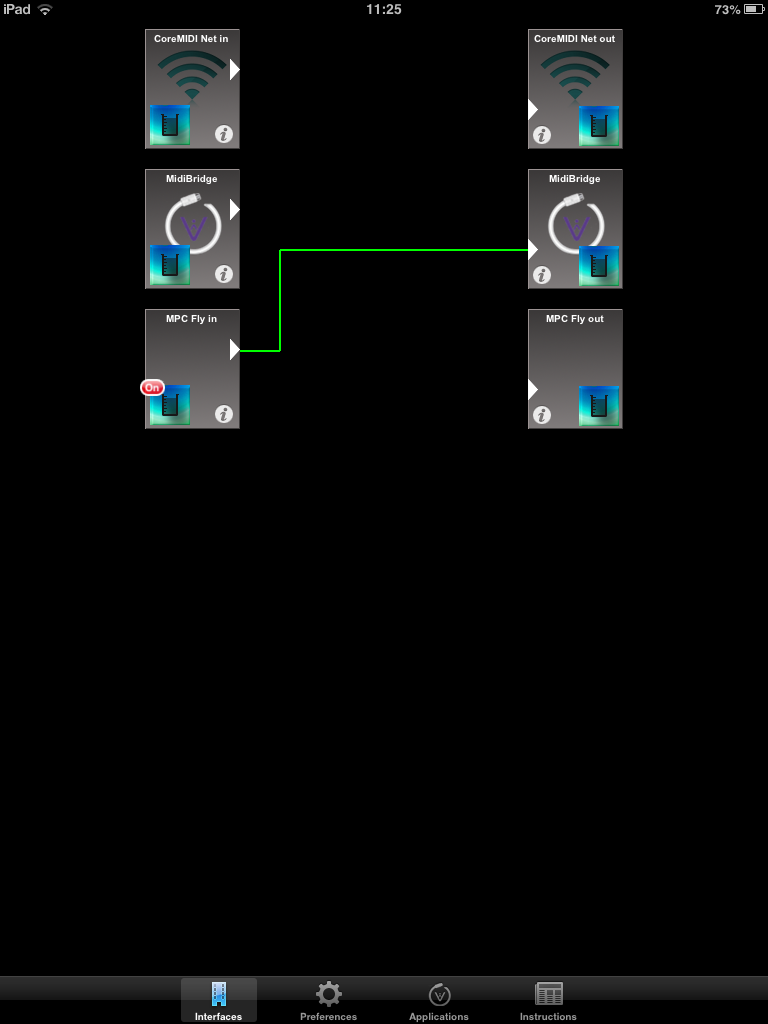
After the MPC Fly is connected start MidiBridge and route the MPC Fly in to MidiBridge out like so:
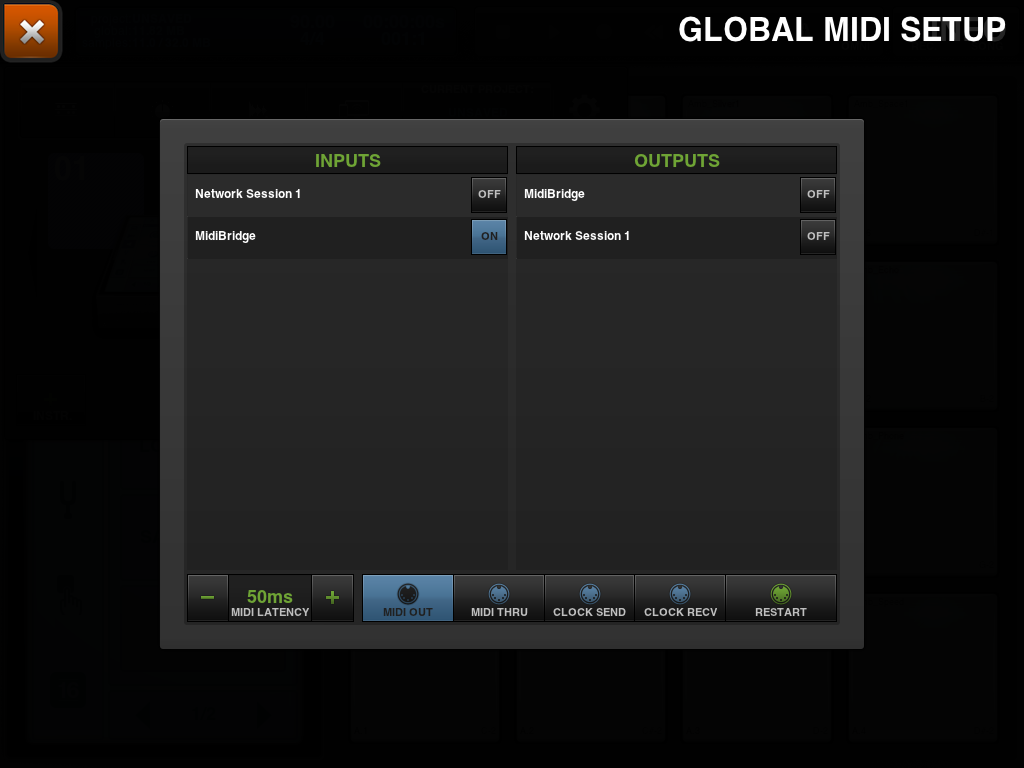
Note, that I prefer to use the MidiBridge output to feed into BeatMaker, but you can of course activate the BM2 virtual ports and feed the Fly into that too if you prefer. Now, start up BeatMaker and navigate to the MIDI SETUP page and ensure that 'MidiBridge' is ON:
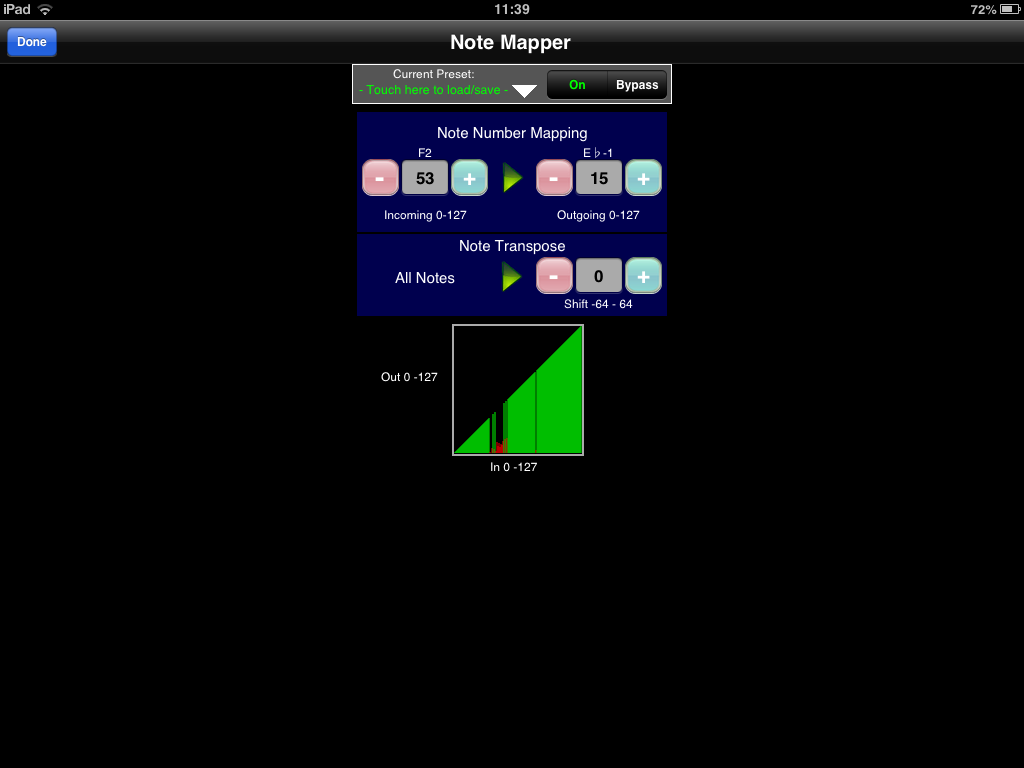
Now that the routing is setup, we will map the Fly's 16 pads individually (you only need to do this once!) First, touch the beaker icon on the MPC Fly in port (on the left) as we are going to apply a NoteMapper module to this port to achieve the mapping. Second, press the disclosure arrow on the 'Note Mapper' module and press the 'On' button to activate the module so you can create your mappings. Third, create the mapping by using the table below as follows:
Repeat the above 15 more times for the remaining 15 mappings in the table. Note, do not touch the 'Note Transpose' selector widget!
The NoteMapper graphic should look like this:
The fourth and final step is to touch the little white downward triangle on the NoteMapper screen and save your mapping as a preset ('MPC Fly to BM2' is probably not a bad name!) so you never have to do this again. I will include this preset into the next version of MidiBridge as a factory preset. Press 'Done' and 'Done' again to return to the main MidiBridge interface. If you have BM2 backgrounded then hitting a pad on the Fly should trigger the correct pad in BM2 and you'll see the ports flash in MidiBridge. I hope this helps get your Fly and BeatMaker 2 talking together. Please do get in touch if you are still having problems. |

This page does not use frames, cookies, java or plugins and should be viewable with just about any browser. Last updated 30 July 2022 (probably by hand using vi) |